
EDIT March 2021: Now that I've updated my website stack (using an ODROID HC1, same board as XU4, but with built-in SATA). I have GoatCounter set up for web analytics, and I can see I'm still getting some traffic to this article from google. If you found this and you are looking to use docker with ODROID XU4, you should know that this article is quite old (4 years old now) and these days docker is way better supported on ODROID XU4 and ARMv7 in general.
I'm running Armbian & I believe I used a script roughly like this to install docker and docker-compose. I also set up multi-architecture docker builds for all of my apps.
Original article:
I have been interested in ARM-based SBCs (Single Board Computer)s for a while -- especially as they become more and more capable/compatible. In the world of cloud computing, I think they are especially interesting because application designs are trending towards horizontal scalability, that is, scaling by adding more processor cores rather than by making each core faster. Plus, they're arguably cheaper both in silicon manufacturing and in power consumption / cooling. One user measured this board at 2w idle and 13w under load at the wall. That's really not a lot of power considering what the thing is capable of!
I finally decided to take the plunge and ordered an ODROID XU4 from ameridroid. I'm planning on switching over to ARM as a platform for my self hosted projects in the future, as a fun way to learn more about the platform and prove that it can be awesome in the web server arena.
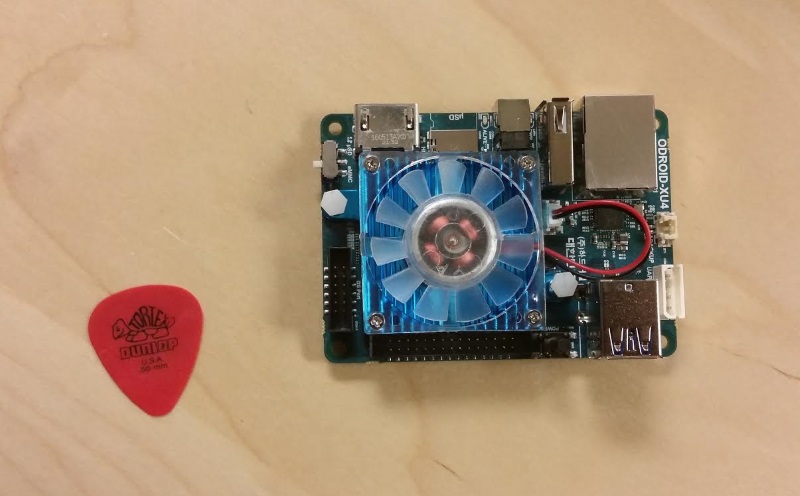
Banana was too big, so guitar pick for scale 😊
About the XU4
I chose this piece of hardware since it appeared to have a good balance of low price, compatibility, and performance.
- Less than $100 including a case, taxes, and shipping.
- Its 32 bit
armhfarchitecture is older and currently more widely supported compared toaarch64. - A handful of different Linux distributions support it.
- Octa-core Exynos processor is pretty fast and has an insane amount of performance per watt.
- Compared to an Intel Celeron G3900 (Q4'15) in Geekbench, the Exynos processor has half the multi-threaded performance but over 3x the power efficiency under load. In power efficiency at idle, it probably beats the
amd64chips even harder.
- Compared to an Intel Celeron G3900 (Q4'15) in Geekbench, the Exynos processor has half the multi-threaded performance but over 3x the power efficiency under load. In power efficiency at idle, it probably beats the
- It has a dedicated gigabit Ethernet chip as well as a full speed USB 3.0 hub.
- USB 3.0 is fast enough for most I/O needs, so I can just plug it into a USB hard drive enclosure and forget about mucking around with SD cards or expensive eMMC chips.
Moving the file system to the USB Hard Drive
First step was to move the operating system (minus the boot partition) to my hard drive in its powered USB 3.0 enclosure. Powered is important since we don't want to stress out the 5v power supply trying to spin up the platters! These SBCs usually do not deal well with peripherals that consume large amounts of current all at once.
The following assumes you have just booted the XU4 from the standard Ubuntu SD card image from ODROID and SSHed to it. The default users are odroid/odroid and root/odroid (only root/odroid for the minimal disto). Make sure to change thier passwords to something more secure with passwd and sudo passwd!
The following was required to get aptitude to work after writing the minimal ubuntu xenial image to the sd card:
apt-get update
apt-get -f install
List the disks and details about them:
fdisk -l
If the disk does not have any partitions created yet, it will look something like this:
Disk /dev/sda: 238.5 GiB, 256060514304 bytes, 500118192 sectors
Disk model:
Units: sectors of 1 * 512 = 512 bytes
Sector size (logical/physical): 512 bytes / 4096 bytes
I/O size (minimum/optimal): 4096 bytes / 4096 bytes
If it does have a partition table, it will show up as the Disklabel type:
Disk /dev/sda: 238.5 GiB, 256060514304 bytes, 500118192 sectors
Disk model:
Units: sectors of 1 * 512 = 512 bytes
Sector size (logical/physical): 512 bytes / 4096 bytes
I/O size (minimum/optimal): 4096 bytes / 4096 bytes
Disklabel type: gpt
Disk identifier: B7839DF2-FE12-4C52-B1E8-397F03157800
If you have to create the partition table / partition, you can do that with the parted command.
sudo parted --script "/dev/sda" mklabel gpt
sudo parted --script --align optimal "/dev/sda" mkpart primary ext4 0% 100%
Find out what the drive partition is called and if it is currently mounted with lsblk. (list block storage)
lsblk
it turned out it was called sda1 (partition 1 on disk a)
if it is currently mounted, you will want to unmount it with sudo umount /dev/sda1
Format the partition we will be using on the HDD as ext4 with label rootfs
sudo mkfs.ext4 /dev/sda1 -L rootfs
Mount the freshly formatted partition at the temporary mount point /mnt
sudo mount /dev/sda1 /mnt
Install rsync and use it to copy the entire filesystem from the SD card to the HDD:
sudo apt-get -y install rsync
sudo rsync -axv / /mnt
go to the boot folder on the SD card
cd /media/boot
install nano ( or use the text editor of your choice )
sudo apt-get -y install nano
edit the boot.ini file to point to the HDD rather than the SD card.
nano boot.ini
This is the part I edited. The changed piece was root=/dev/sda1
#--------------------------------
# Basic Ubuntu Setup. Don't touch unless you know what you are doing.
# -------------------------------
setenv bootrootfs "console=tty1 console=ttySAC2,115200n8 root=/dev/sda1 rootwait ro fsck.repair=yes net.ifnames=0 "
After that, a restart of the XU4 was required to complete the process. reboot -p over SSH did the trick. After that, lsblk shows that the HDD partition is mounted at /. The SD card will still be required for boot, but it will not slow anything down during normal operation.
Installing Docker
Installing docker through the instructions for Ubuntu 16.04 Xenial on the Docker Website did not work, but installing this older version through the ubuntu ports package repository seemed to work fine:
sudo apt-get install docker.io
We can test docker on someone else's armv7 image from docker hub:
sudo docker run --rm armv7/armhf-ubuntu_core:16.04 cat /etc/lsb-release
Creating a Base Image from Scratch
My method for getting started with a base image was adapted from the user Hominidae on the ODROID forums.
To build a docker base image, Download a minimal version of ubuntu to ~/docker-base-image/ubuntu with debootstrap
mkdir ~/docker-base-image && cd ~/docker-base-image

sudo apt-get install -y debootstrap
sudo debootstrap --verbose --variant=minbase --include=iproute,iputils-ping --arch armhf xenial ./ubuntu http://ports.ubuntu.com/ubuntu-ports/
overwrite the built in sources.list file with the one from ODROID
sudo cp /etc/apt/sources.list ./ubuntu/etc/apt/sources.list
Make a tar of the minimal Ubuntu OS install that can be used in a Dockerfile.
sudo tar -C ubuntu -c . > ubuntu.tar
Create your Dockerfile
nano Dockerfile
Then paste in the following and save:
FROM scratch

ADD ubuntu.tar /

#ripped from https://github.com/tianon/docker-brew-ubuntu-core/blob/master/update.sh

# a few minor docker-specific tweaks
# see https://github.com/docker/docker/blob/9a9fc01af8fb5d98b8eec0740716226fadb3735c/contrib/mkimage/debootstrap
RUN set -xe \
        \
        # https://github.com/docker/docker/blob/9a9fc01af8fb5d98b8eec0740716226fadb3735c/contrib/mkimage/debootstrap#L40-L48
        && echo '#!/bin/sh' > /usr/sbin/policy-rc.d \
        && echo 'exit 101' >> /usr/sbin/policy-rc.d \
        && chmod +x /usr/sbin/policy-rc.d \
        \
        # https://github.com/docker/docker/blob/9a9fc01af8fb5d98b8eec0740716226fadb3735c/contrib/mkimage/debootstrap#L54-L56
        && dpkg-divert --local --rename --add /sbin/initctl \
        && cp -a /usr/sbin/policy-rc.d /sbin/initctl \
        && sed -i 's/^exit.*/exit 0/' /sbin/initctl \
        \
        # https://github.com/docker/docker/blob/9a9fc01af8fb5d98b8eec0740716226fadb3735c/contrib/mkimage/debootstrap#L71-L78
        && echo 'force-unsafe-io' > /etc/dpkg/dpkg.cfg.d/docker-apt-speedup \
        \
        # https://github.com/docker/docker/blob/9a9fc01af8fb5d98b8eec0740716226fadb3735c/contrib/mkimage/debootstrap#L85-L105
        && echo 'DPkg::Post-Invoke { "rm -f /var/cache/apt/archives/*.deb /var/cache/apt/archives/partial/*.deb /var/cache/apt/*.bin || true"; };' > /etc/apt/apt.conf.d/docker-clean \
        && echo 'APT::Update::Post-Invoke { "rm -f /var/cache/apt/archives/*.deb /var/cache/apt/archives/partial/*.deb /var/cache/apt/*.bin || true"; };' >> /etc/apt/apt.conf.d/docker-clean \
        && echo 'Dir::Cache::pkgcache ""; Dir::Cache::srcpkgcache "";' >> /etc/apt/apt.conf.d/docker-clean \
        \
        # https://github.com/docker/docker/blob/9a9fc01af8fb5d98b8eec0740716226fadb3735c/contrib/mkimage/debootstrap#L109-L115
        && echo 'Acquire::Languages "none";' > /etc/apt/apt.conf.d/docker-no-languages \
        \
        # https://github.com/docker/docker/blob/9a9fc01af8fb5d98b8eec0740716226fadb3735c/contrib/mkimage/debootstrap#L118-L130
        && echo 'Acquire::GzipIndexes "true"; Acquire::CompressionTypes::Order:: "gz";' > /etc/apt/apt.conf.d/docker-gzip-indexes \
        \
        # https://github.com/docker/docker/blob/9a9fc01af8fb5d98b8eec0740716226fadb3735c/contrib/mkimage/debootstrap#L134-L151
        && echo 'Apt::AutoRemove::SuggestsImportant "false";' > /etc/apt/apt.conf.d/docker-autoremove-suggests

# delete all the apt list files since they're big and get stale quickly
RUN rm -rf /var/lib/apt/lists/*

# this forces "apt-get update" in dependent images, which is also good
# enable the universe
RUN sed -i 's/^#\s*\(deb.*universe\)$/\1/g' /etc/apt/sources.list

# make systemd-detect-virt return "docker"
# See: https://github.com/systemd/systemd/blob/aa0c34279ee40bce2f9681b496922dedbadfca19/src/basic/virt.c#L434
RUN mkdir -p /run/systemd && echo 'docker' > /run/systemd/container

# overwrite this with 'CMD []' in a dependent Dockerfile
CMD ["/bin/bash"]
Now, build the docker image based on the Dockerfile you just created:
sudo docker build -t ubuntu:xenial-armhf .
examine the resulting base image & test it:
sudo docker images
sudo docker run --rm ubuntu:xenial-armhf cat /etc/lsb-release
That's all for now. I will be posting more detail later after I set up image builds and deploy Let's Encrypt, a reverse proxy, Ghost, Gogs, and more on the XU4.
Comments